Sunrise photography is one of the most rewarding genres of photography because it combines soft light, dramatic color transitions, and a calm atmosphere that rarely exists later in the day.
As the sun rises, light changes minute by minute, creating unique opportunities to capture warm tones, pastel skies, and long shadows that add depth and emotion to an image.
Unlike harsh midday light, sunrise offers gentle contrast and natural color harmony, making it ideal for landscapes, cityscapes, seascapes, and even minimalist compositions. Successful sunrise photography is not just about waking up early.
It requires planning, understanding light behavior, choosing the right equipment, and making thoughtful exposure and composition decisions in a very short time window. From blue hour to golden hour, every phase of sunrise has its own visual character.
Knowing how to adapt to these changes allows photographers to create images that feel balanced, natural, and visually compelling without relying on excessive editing.
Best Times For Sunrise Photography: Golden Hour, Blue Hour, And Simple Planning

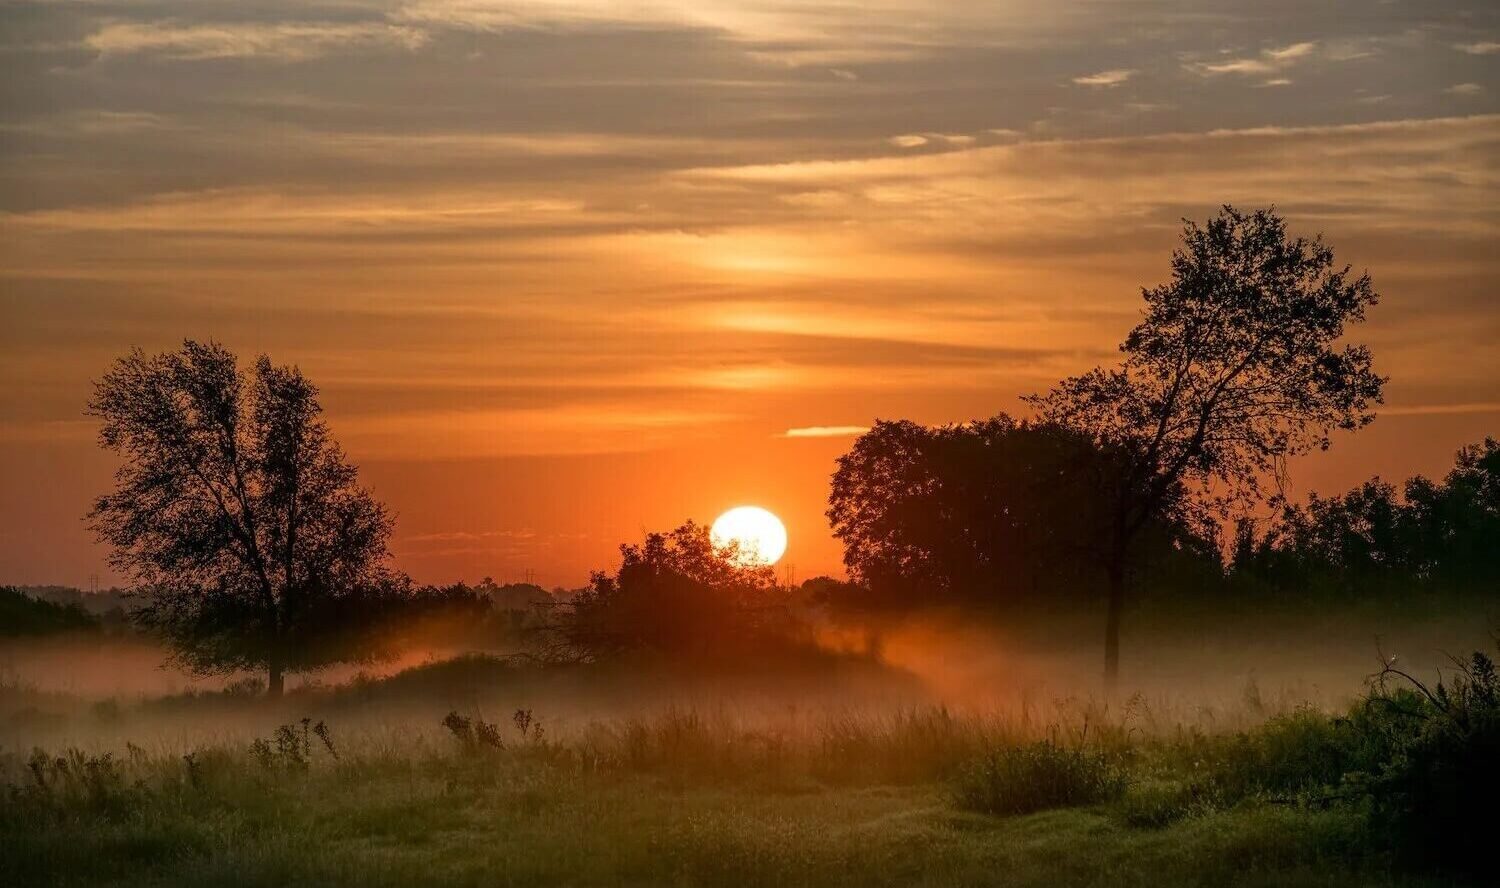
Timing is everything in sunrise photography, and the most important moments often happen before the sun actually appears. The blue hour begins roughly 30 to 45 minutes before sunrise, when the sky takes on deep blue, purple, and cool pastel tones.
During this phase, contrast is low and artificial lights may still be visible, making it perfect for city skylines, harbors, and architectural scenes. As the sun approaches the horizon, colors begin to shift rapidly.
This transition period often produces pink, orange, and soft red hues that reflect off clouds and surfaces. The golden hour starts once the sun breaks the horizon, delivering warm, directional light that enhances textures and creates long, dramatic shadows.
Many photographers consider this the most visually pleasing phase of sunrise photography. Simple planning tools can make a big difference.
Checking sunrise direction, weather forecasts, and cloud coverage helps predict how colorful the sky might become.
Light cloud layers often enhance color, while completely clear skies may produce softer, less dramatic results. Arriving early allows time to set up, explore compositions, and adapt as light evolves.
Sunrise Photography Gear: Tripod, Lens Choices, And Filters That Help
Because sunrise photography begins in low-light conditions, stable gear is essential. A sturdy tripod allows you to use slower shutter speeds without introducing camera shake.
This is especially important during blue hour when exposures can be several seconds long. A tripod also helps maintain consistent framing when shooting multiple exposures or time sequences.
Lens choice depends on your creative intent. Wide-angle lenses are popular for capturing expansive skies and including foreground elements such as rocks, paths, or water.
Standard zoom lenses provide flexibility, while telephoto lenses are useful for isolating the rising sun, compressing layers of mountains, or highlighting distant details.
Filters can enhance sunrise photography when used carefully. Neutral density filters allow longer exposures for smooth water or moving clouds, while graduated ND filters help balance bright skies with darker foregrounds.
Polarizing filters can reduce glare and deepen color saturation, but their effect varies depending on the sun’s angle, so they should be used selectively during sunrise.
Composition Ideas That Work: Foreground Interest, Silhouettes, And Reflections
Strong composition is what separates an average sunrise photo from a memorable one. Foreground interest adds depth and guides the viewer’s eye into the frame.
Rocks, plants, fences, or leading lines such as roads and shorelines can anchor the image and prevent the sky from feeling disconnected from the scene. Silhouettes are particularly effective during sunrise photography.
When the background is brighter than the subject, shapes become bold and graphic. Trees, people, buildings, or boats can create striking silhouettes that add storytelling elements without distracting details.
Reflections offer another powerful compositional tool. Calm water surfaces such as lakes, puddles, or wet sand can mirror the sky’s colors, creating symmetry and balance.
Positioning the horizon carefully and maintaining clean lines helps keep reflections visually strong and uncluttered. Using the rule of thirds, negative space, and careful horizon placement ensures that the image feels intentional rather than accidental.
Composition should evolve as the light changes, so being flexible and experimenting with multiple frames is key.
Sunrise Photography Exposure Settings: ISO, Shutter Speed, Aperture, And Bracketing
Exposure control is critical in sunrise photography due to rapidly changing light levels. Keeping ISO as low as possible helps preserve image quality and reduce noise, especially in shadow areas. A tripod makes low ISO settings practical even in very dim conditions.
Aperture choice depends on depth of field requirements. Landscape photographers often use mid-range apertures to keep both foreground and background sharp, while smaller apertures can enhance sunstars once the sun is visible.
Shutter speed is adjusted based on available light and creative intent, such as freezing motion or creating smooth water effects.
High-contrast scenes are common at sunrise, especially when the sun rises behind the subject. Exposure bracketing is a useful technique in these situations.
By capturing multiple exposures at different brightness levels, photographers can preserve highlight and shadow detail and blend them later if needed. Even when not blending, bracketing provides backup options as conditions change quickly.
Keeping Colors Natural In Editing: White Balance, RAW Workflow, And Noise Control
Editing sunrise photos should enhance what was already present rather than overpower it.
Shooting in RAW format gives greater flexibility when adjusting white balance, highlights, and shadows. Auto white balance can work well, but manually adjusting temperature allows better control over how warm or cool the scene feels.
It is tempting to increase saturation and contrast aggressively, but subtle adjustments usually produce more realistic and pleasing results. Sunrise photography benefits from smooth color transitions and gentle tonal shifts.
Over-editing can quickly destroy the natural atmosphere that makes sunrise images special. Noise control is also important, particularly in shadow areas captured during blue hour.
Keeping ISO low during capture reduces the need for heavy noise reduction later. When noise reduction is necessary, applying it selectively helps retain fine details and textures. Maintaining consistency across a series of sunrise photos creates a cohesive visual style.
Balanced editing ensures that colors remain believable while still conveying the emotion and calm associated with early morning light.
See you in the next post,
Anil UZUN