Long exposure photography is one of the most creative techniques used in landscape and outdoor photography. Instead of freezing movement, this method captures motion over time, creating smooth and dramatic visual effects.
Flowing water can appear soft and silky, while moving clouds can stretch across the sky with a cinematic look. Because of these effects, Long exposure photography is widely used by photographers who want to create more artistic and atmospheric images.
The technique works by keeping the camera shutter open longer than in normal photography. During this time, moving elements continue to change position while stationary subjects remain sharp.
This contrast between movement and stability gives the image a unique visual balance. Waterfalls, rivers, coastlines, and cloudy skies are some of the most common subjects used in Long exposure photography.
However, creating strong results requires more than simply using a slow shutter speed. Camera stability, light conditions, composition, and timing all influence the final image. Lighting is especially important.
Bright daylight can make long exposures difficult because too much light reaches the sensor. This is why many photographers use ND filters to reduce exposure and allow slower shutter speeds even during daytime conditions.
In this guide, you will learn the basics of Long exposure photography, the equipment needed, the best camera settings, planning techniques, and how to avoid common mistakes that reduce image quality.
Long Exposure Photography Basics For Smooth Water And Soft Cloud Movement
The main idea behind Long exposure photography is using a slower shutter speed to record movement over a longer period of time. Instead of capturing a single frozen moment, the camera collects motion gradually.
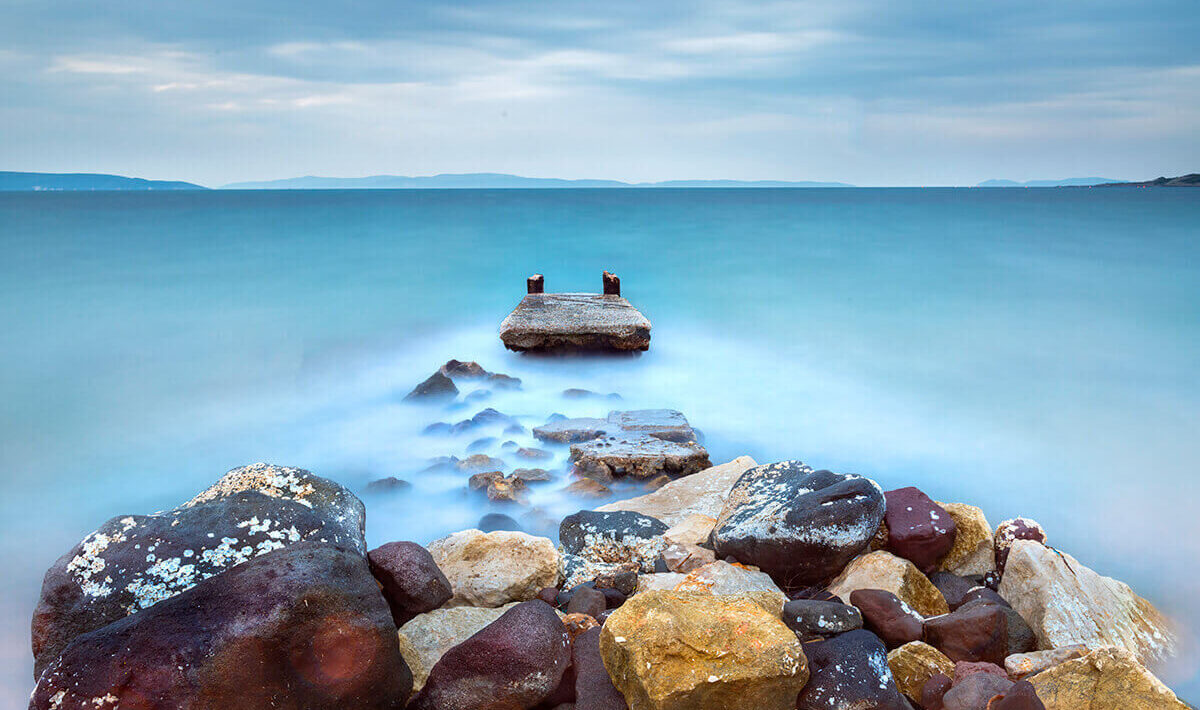
For water photography, this creates the well known silky effect. Rivers, waterfalls, and ocean waves appear smoother and softer because the camera blends movement together during exposure. This effect adds calmness and depth to landscape photos.
Cloud movement works in a similar way. When clouds move across the sky during a long exposure, they create stretched shapes and flowing lines. This gives outdoor scenes a more dramatic atmosphere.
Because of this visual effect, Long exposure photography is especially popular in coastal and mountain landscapes. The balance between moving and still elements is important.
Rocks, buildings, trees, or bridges often remain sharp while water and clouds blur smoothly around them. This contrast creates visual strength inside the composition. Weather conditions also affect results.
Wind speed, cloud density, and water movement all influence the final appearance. Some scenes require only a few seconds of exposure, while others may need much longer.
Understanding these basics helps photographers create more controlled and visually pleasing Long exposure photography images.
Long Exposure Photography Gear Tripod ND Filters And Lens Choices That Matter
The right equipment is essential for successful Long exposure photography. Since the shutter remains open for a longer time, even small vibrations can ruin sharpness. A sturdy tripod is the most important tool.
Without proper camera stability, the entire image may become blurry. Strong tripods are especially useful in windy outdoor locations where movement can easily affect the shot. ND filters are another important part of Long exposure photography.
These filters reduce the amount of light entering the lens, making it possible to use slower shutter speeds even during bright daylight. Different filter strengths create different exposure possibilities depending on the scene.
Lens choice also matters. Wide angle lenses are often preferred because they capture more of the landscape and create stronger depth inside the composition. They also help emphasize movement in clouds and water.
Remote shutter releases or camera timers are useful for reducing vibration when pressing the shutter button. Even a small movement from touching the camera can reduce sharpness during long exposures. Lens cleaning is equally important.
Water spray, dust, or fingerprints can become more visible in long exposure images, especially around highlights and reflections. Using the correct gear allows Long exposure photography results to look cleaner, sharper, and more professional.
How To Set Shutter Speed ISO And Aperture For Better Water And Cloud Effects
Camera settings are one of the most important parts of Long exposure photography. Shutter speed, ISO, and aperture must work together to create balanced exposures. Shutter speed controls how long movement is recorded.
Shorter long exposures may create slight motion blur, while very long exposures produce smoother and more dramatic effects. Fast moving water often requires only a few seconds, while cloud movement may need much longer exposures.
ISO should usually remain as low as possible. Low ISO values reduce digital noise and help maintain cleaner image quality. This is especially important in Long exposure photography, where image clarity matters.
Aperture affects both brightness and depth of field. Narrow apertures allow more of the scene to stay sharp while also reducing light entering the lens. This helps photographers maintain slower shutter speeds.
Balancing these settings can be challenging in bright environments. ND filters are often necessary to prevent overexposure. Without them, daylight conditions may force the shutter speed to remain too fast.
Checking the histogram after each shot is also helpful. This allows photographers to adjust exposure more accurately and avoid losing highlight or shadow details.
Correct settings help create smooth water textures, flowing cloud movement, and cleaner Long exposure photography results.
Long Exposure Photography Planning Composition Light And Timing In Outdoor Scenes
Strong Long exposure photography requires careful planning before the camera is even set up. Composition, timing, and light conditions all affect the final image. A balanced composition should include both stable and moving elements.
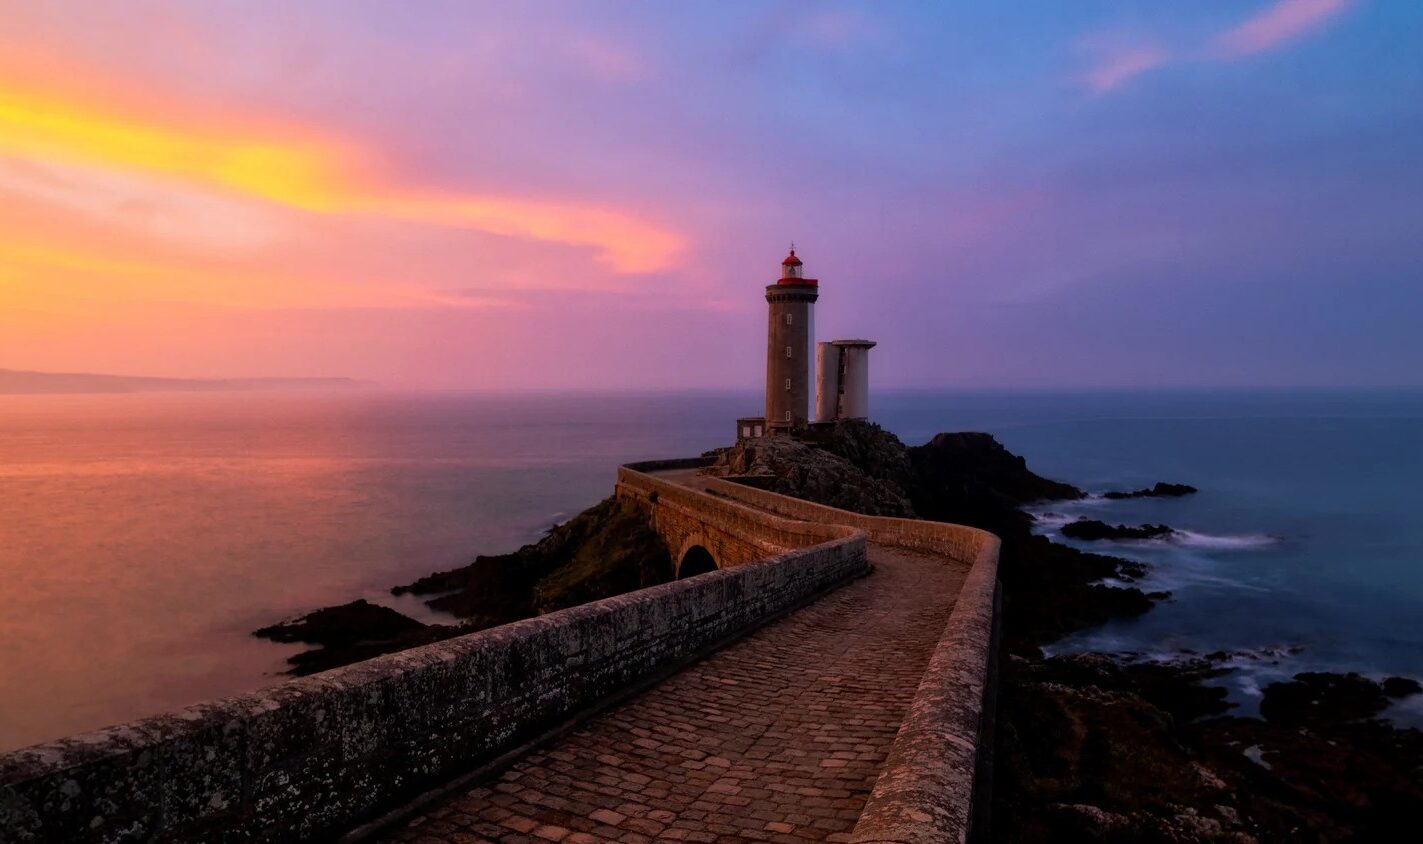
Rocks, trees, docks, or buildings provide visual anchors while water and clouds create motion around them. This balance gives the image structure. Light timing is extremely important.
Sunrise and sunset are often the best moments for Long exposure photography because the softer light creates more natural exposures and stronger atmosphere. Weather conditions should also be considered.
Slightly windy days with moving clouds usually create more dramatic results than completely clear skies. Water movement can also change depending on tides and wind direction. Foreground elements improve depth and guide the viewer through the scene.
Leading lines, reflections, and layered compositions can make long exposure images feel more immersive. Location scouting before the shoot is another useful step.
Understanding where the light will fall and how movement behaves helps photographers prepare more effectively. Good planning makes Long exposure photography more predictable and increases the chances of capturing visually powerful results.
Common Mistakes And Simple Fixes For Cleaner And Sharper Results
Many beginners struggle with Long exposure photography because small mistakes can strongly affect image quality. Understanding these problems helps improve consistency. One common mistake is using an unstable tripod.
Even minor movement can reduce sharpness during long exposures. Placing the tripod on stable ground and avoiding strong vibrations is essential. Incorrect exposure settings are another frequent issue. Too much light can cause overexposed highlights and loss of detail.
ND filters and smaller apertures often help solve this problem. Autofocus problems can also occur, especially in low light. Many photographers prefer focusing manually before starting the exposure. This creates more reliable sharpness.
Wind can affect both the camera and elements inside the scene. Strong wind may move plants or lightweight tripods during exposure. Adding weight to the tripod can improve stability. Dirty lenses are another overlooked issue.
Water drops or dust become more noticeable in Long exposure photography, especially near bright reflections or skies. Some photographers also choose exposure times that are either too short or too long for the scene.
Experimenting with different shutter speeds often leads to better results. Avoiding these mistakes allows Long exposure photography images to appear cleaner, sharper, and more professional.
See you in the next post,
Anil UZUN