In the digital era, understanding photo editing techniques is essential for photographers and visual storytellers at any level.
Whether you capture images with a DSLR camera or a smartphone, editing allows you to transform your raw photos into polished, impactful works. From simple adjustments to complex manipulations, editing is the step where your creative vision comes alive.
Learning photo editing techniques helps you correct exposure problems, enhance color, sharpen important details, and apply artistic effects that set your images apart. For beginners, mastering the basics will quickly improve the overall quality of your photos.
As you gain experience, more advanced methods allow you to refine your style and develop a consistent look across your portfolio. Modern editing software offers an incredible range of tools.
Programs like Adobe Lightroom and Photoshop, Capture One, and many affordable alternatives provide everything you need to produce professional results. The key is to learn which adjustments work best for your photography goals.
In this guide, you will discover foundational and advanced photo editing techniques that will help you elevate every image you create.
Photo Editing Techniques For Adjusting Color And Tone
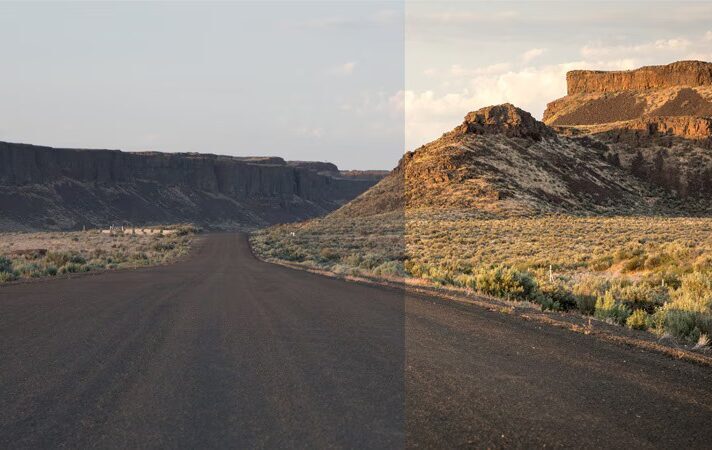
Color and tone adjustments are often the first steps in post-processing. They set the mood of your photograph and ensure that the colors accurately reflect the scene you captured.
One of the most essential photo editing techniques is adjusting white balance. If your image has an unnatural blue or yellow tint, correcting the white balance restores true-to-life colors.
Most editing software includes sliders or eyedropper tools to neutralize color casts easily. Next, fine-tune exposure to brighten or darken your image. Even small changes can bring out hidden details and make the composition more visually balanced.
Use the histogram as a guide to avoid losing important information in shadows or highlights. Color grading is another powerful adjustment.
By shifting the hue, saturation, and luminance of individual color ranges, you can create a signature style or adapt the mood to match your story. For example, increasing the warmth in a sunset photo can make the scene feel more inviting.
Tone curves offer precise control over contrast and brightness. By shaping the curve, you can lift shadows, deepen blacks, or enhance midtones. This flexibility makes tone curves one of the most valuable photo editing techniques for professionals.
Essential Tools To Improve Image Sharpness
Sharpness is critical for making your subject stand out and ensuring your image looks professional. Poor focus or slight motion blur can be corrected with the right photo editing techniques, as long as the image is not too far out of focus.
The sharpening tool increases the contrast along edges, creating the appearance of a clearer image. Use it moderately to avoid introducing noise or halos. A radius of around 1.0 pixels is often a good starting point.
Clarity is another adjustment that enhances midtone contrast. This effect makes textures pop and adds depth to landscapes, architecture, and environmental portraits. Be cautious when applying clarity to close-up portraits, as it can emphasize skin imperfections.
If your photo has minor blur, use a dedicated sharpening filter like Unsharp Mask or High Pass Filter. The Unsharp Mask provides control over amount, radius, and threshold, letting you target specific areas without over-processing.
Always zoom in to 100 percent to review the sharpening effect before finalizing. Subtle improvements are usually more effective than aggressive adjustments when applying these photo editing techniques.
Photo Editing Techniques To Enhance Details And Texture
Details and textures bring life and realism to your photos. Whether you are capturing a sweeping landscape or a macro shot of a flower, accentuating fine details makes the image more engaging.
One of the most effective photo editing techniques for detail enhancement is selective adjustment. Using adjustment brushes or masks, you can increase clarity, sharpness, or contrast only in the areas you want to emphasize.
This targeted approach keeps the rest of the image soft and balanced. Texture sliders in modern editing software offer subtle control over fine details without affecting overall contrast.
Increasing texture can reveal hidden elements like fabric patterns or intricate surfaces. Dehaze is another tool that helps recover detail in foggy or low-contrast scenes.
By reducing atmospheric haze, it brings out the true color and texture in landscapes and cityscapes. Remember that enhancing detail should serve your artistic intent. Over-processing can make photos look artificial.
For natural-looking results, apply these photo editing techniques gradually and combine them with other adjustments like tone and color corrections.
Retouching Portraits For A Natural Look
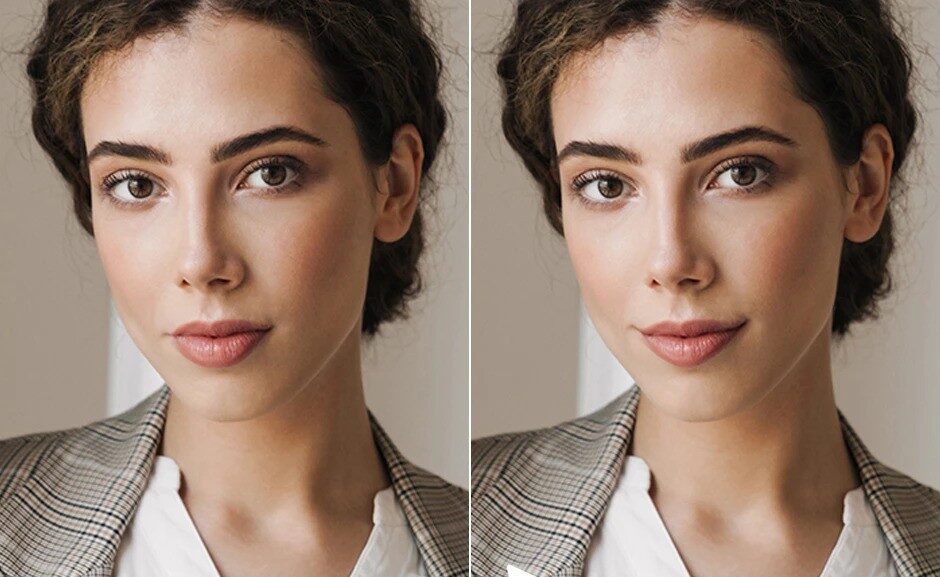
Portrait retouching requires a delicate balance between improving appearance and maintaining authenticity. Effective photo editing techniques help you remove distractions while preserving the subject’s character.
Start by cleaning up blemishes with the healing brush or spot removal tool. Use small, controlled strokes to avoid affecting surrounding skin texture. Avoid completely removing natural marks that define a person’s uniqueness unless specifically requested.
Smoothing skin requires subtlety. Frequency separation is an advanced technique that separates texture and color into different layers, allowing you to retouch each independently.
This method retains pores and fine details, preventing the plastic look that often results from heavy-handed smoothing. Eyes are the focal point of most portraits.
Brightening the whites slightly and adding contrast to the iris will make the subject appear more vibrant. Use dodge and burn techniques to contour the face gently, highlighting cheekbones and softening shadows.
Finally, adjust color and exposure selectively to ensure skin tones are even and flattering. By combining these photo editing techniques, you can produce polished portraits that feel authentic and professional.
Photo Editing Techniques For Adding Creative Effects
Creative effects are where your style and imagination come alive. When used thoughtfully, they help tell a story and create a mood that resonates with viewers.
Converting to black and white simplifies the image and emphasizes shapes, lines, and light. Experiment with contrast and individual color channels to control how each tone converts to grayscale.
This approach allows for dramatic or soft black and white renditions depending on your vision. Split toning is another popular technique that adds color to highlights and shadows independently.
For example, warm highlights combined with cool shadows create a cinematic atmosphere that elevates your images. Textures and overlays can introduce artistic elements.
Adding a subtle grain effect can replicate the look of film photography. Light leaks or bokeh overlays can evoke nostalgia or romanticism.
Finally, double exposure combines two images into a single frame. Modern editing software allows precise blending and masking, letting you merge portraits with landscapes or abstract shapes.
These photo editing techniques require experimentation and patience but offer unlimited creative potential.
See you in the next post,
Anil UZUN