Entering the world of digital photography is an exciting journey full of creativity, discovery, and learning.
Whether you are using a professional DSLR, a mirrorless camera, or even a high-end smartphone, understanding your camera’s settings is essential to capturing compelling and technically sound images.
Many beginners rely heavily on automatic modes, trusting the camera to make all the decisions. While this is helpful at first, learning manual controls will give you complete creative freedom and allow you to adapt to any shooting situation.
The foundation of digital photography is understanding exposure, which involves balancing ISO, aperture, and shutter speed. These three elements work together to determine how light or dark your photo will be and what artistic effects you can achieve.
Additionally, color profiles, white balance, and focus settings all play vital roles in defining the mood, sharpness, and overall quality of your photos.
By mastering these fundamentals, you will develop the confidence to move beyond snapshots and start producing professional-level results.
Digital Photography: Understanding Exposure Basics
Exposure is the cornerstone of digital photography, as it determines how much light hits your camera’s sensor. A properly exposed image retains detail in both shadows and highlights and accurately reflects the scene you see with your eyes.
Exposure is controlled by three main settings:
Aperture defines how wide the lens opens when capturing an image. A wide aperture, such as f/2.8, lets in more light and creates a shallow depth of field, which blurs the background. A narrow aperture, like f/11, keeps more of the scene in focus.
Shutter speed measures how long the sensor is exposed to light. Faster shutter speeds, such as 1/1000 second, freeze motion, while slower speeds, like 1/30 second, capture movement with intentional blur or help gather more light in dim conditions.
ISO determines the sensitivity of your sensor to light. Lower ISO values, such as 100, produce cleaner images with minimal noise. Higher ISO settings, like 3200, brighten dark scenes but introduce more grain.
Mastering these three settings is essential in digital photography. It requires practice, but as you experiment, you will learn how to use exposure creatively to enhance your photos.
How To Balance ISO, Aperture, And Shutter Speed
Balancing ISO, aperture, and shutter speed is one of the most important skills in digital photography. Each setting influences the others, so understanding their relationship is crucial to achieving the desired exposure and artistic effect.
If you are shooting a portrait and want a beautifully blurred background, you might choose a wide aperture like f/2.8. However, because this allows more light into the camera, you may need to use a faster shutter speed to prevent overexposure.
Conversely, if you are photographing a landscape and want everything in focus, you will use a narrower aperture, such as f/11. To compensate for the smaller opening, you might need to slow down your shutter speed or increase the ISO.
When working in low light, raising the ISO helps brighten the image. Keep in mind that higher ISO settings can introduce noise, so try to use the lowest ISO possible while still getting enough light.
A good approach to balancing these settings is to prioritize the element that matters most to your shot. For motion, adjust shutter speed first. For depth of field, choose the aperture. Then adjust ISO to fill in the exposure. With time and practice, balancing these variables will become second nature in your digital photography workflow.
Digital Photography Color Profiles And White Balance
Color plays a huge role in the mood and realism of a photo. In digital photography, understanding how color profiles and white balance work will help you achieve consistent and true-to-life results.
A color profile determines how your camera interprets and records colors. Most cameras offer different profiles such as Standard, Vivid, Portrait, or Landscape. Each profile adjusts contrast, saturation, and tonal range.
If you shoot in RAW format, you have more flexibility to change or fine-tune color profiles later during editing. White balance adjusts the color temperature of your images to ensure whites appear truly white and all other colors remain accurate.
Different lighting conditions, such as daylight, shade, or tungsten, can create color casts that make your images look too warm or cool. Many cameras have automatic white balance, which does a decent job most of the time.
However, manual white balance gives you better control, especially in tricky lighting. For precise adjustments, you can set the Kelvin temperature yourself.
For example, 5500K is considered neutral daylight, while lower numbers add warmth and higher numbers add coolness.
Consistently setting the right color profile and white balance ensures your digital photography maintains a professional and polished look, no matter the shooting conditions.
Focusing Techniques For Sharper Images
Sharp focus is one of the first things viewers notice in a photo. In digital photography, mastering focus techniques will help you direct attention and create a sense of depth.
Modern cameras offer different autofocus modes. Single-shot autofocus (AF-S) is ideal for still subjects, while continuous autofocus (AF-C) tracks moving subjects and keeps them sharp as they move across the frame.
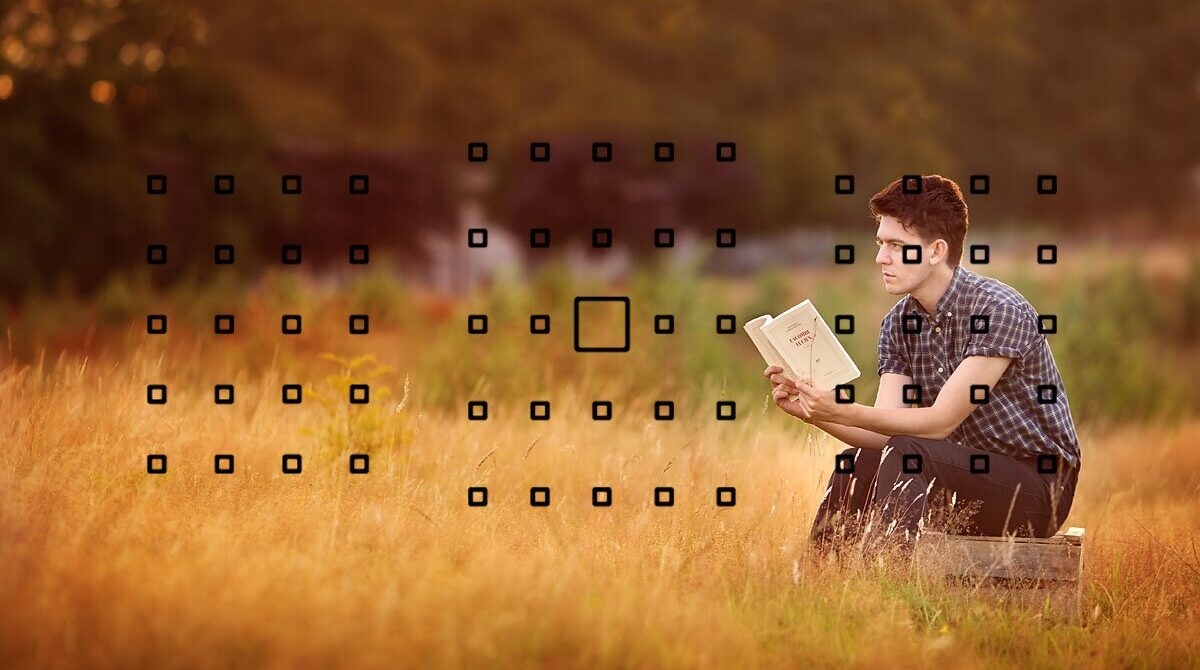
Many cameras also feature selectable focus points. Manually choosing your focus point allows you to control exactly where the sharpest area of your image will be. For portraits, focus on the eyes to create a strong connection with the viewer.
Some cameras have advanced eye-detection autofocus, which automatically locks onto your subject’s eyes and ensures they remain in perfect focus.
To improve stability and sharpness, especially at slower shutter speeds, consider using a tripod or image stabilization features built into your lens or camera body. Using a remote shutter release or timer helps avoid camera shake during exposure.
Practicing these techniques regularly will elevate the technical quality of your digital photography and make your images stand out.
Digital Photography: Common Mistakes And How To Avoid Them
Learning digital photography comes with inevitable mistakes. Recognizing and correcting these common errors will accelerate your progress and improve your results.
One of the most frequent mistakes is improper exposure. Relying only on the camera’s LCD can be misleading because it does not always show true brightness. Instead, use your histogram to check if highlights are blown out or shadows are crushed.
Another common issue is focusing errors. Using the wrong focus mode or relying on the camera’s default focus point can result in blurry subjects. Always take the time to choose the appropriate autofocus setting and verify focus before pressing the shutter.
Compositional mistakes also affect image quality. Centering every subject or neglecting the rule of thirds can lead to static and uninteresting photos. Experiment with different angles and framing to create more dynamic images.
Finally, overlooking preparation can cost you important shots. Always check battery levels, memory card space, and settings before you start shooting. A few moments of preparation can prevent frustrating mistakes later.
By understanding these pitfalls and taking a mindful approach, you will develop strong habits that make your digital photography more rewarding and successful.
See you in the next post,
Anil UZUN

